
In Artiko.ai, an Assistant (or chatbot) is a customized AI instance that you can configure with specific models, integrated plugins, and knowledge sources. This documentation covers both the Assistants section (where existing chatbots are listed) and the Chatbot Creation / Editing flow, showing how to set up new AI bots for different use cases.
1. Overview of the Assistants Section
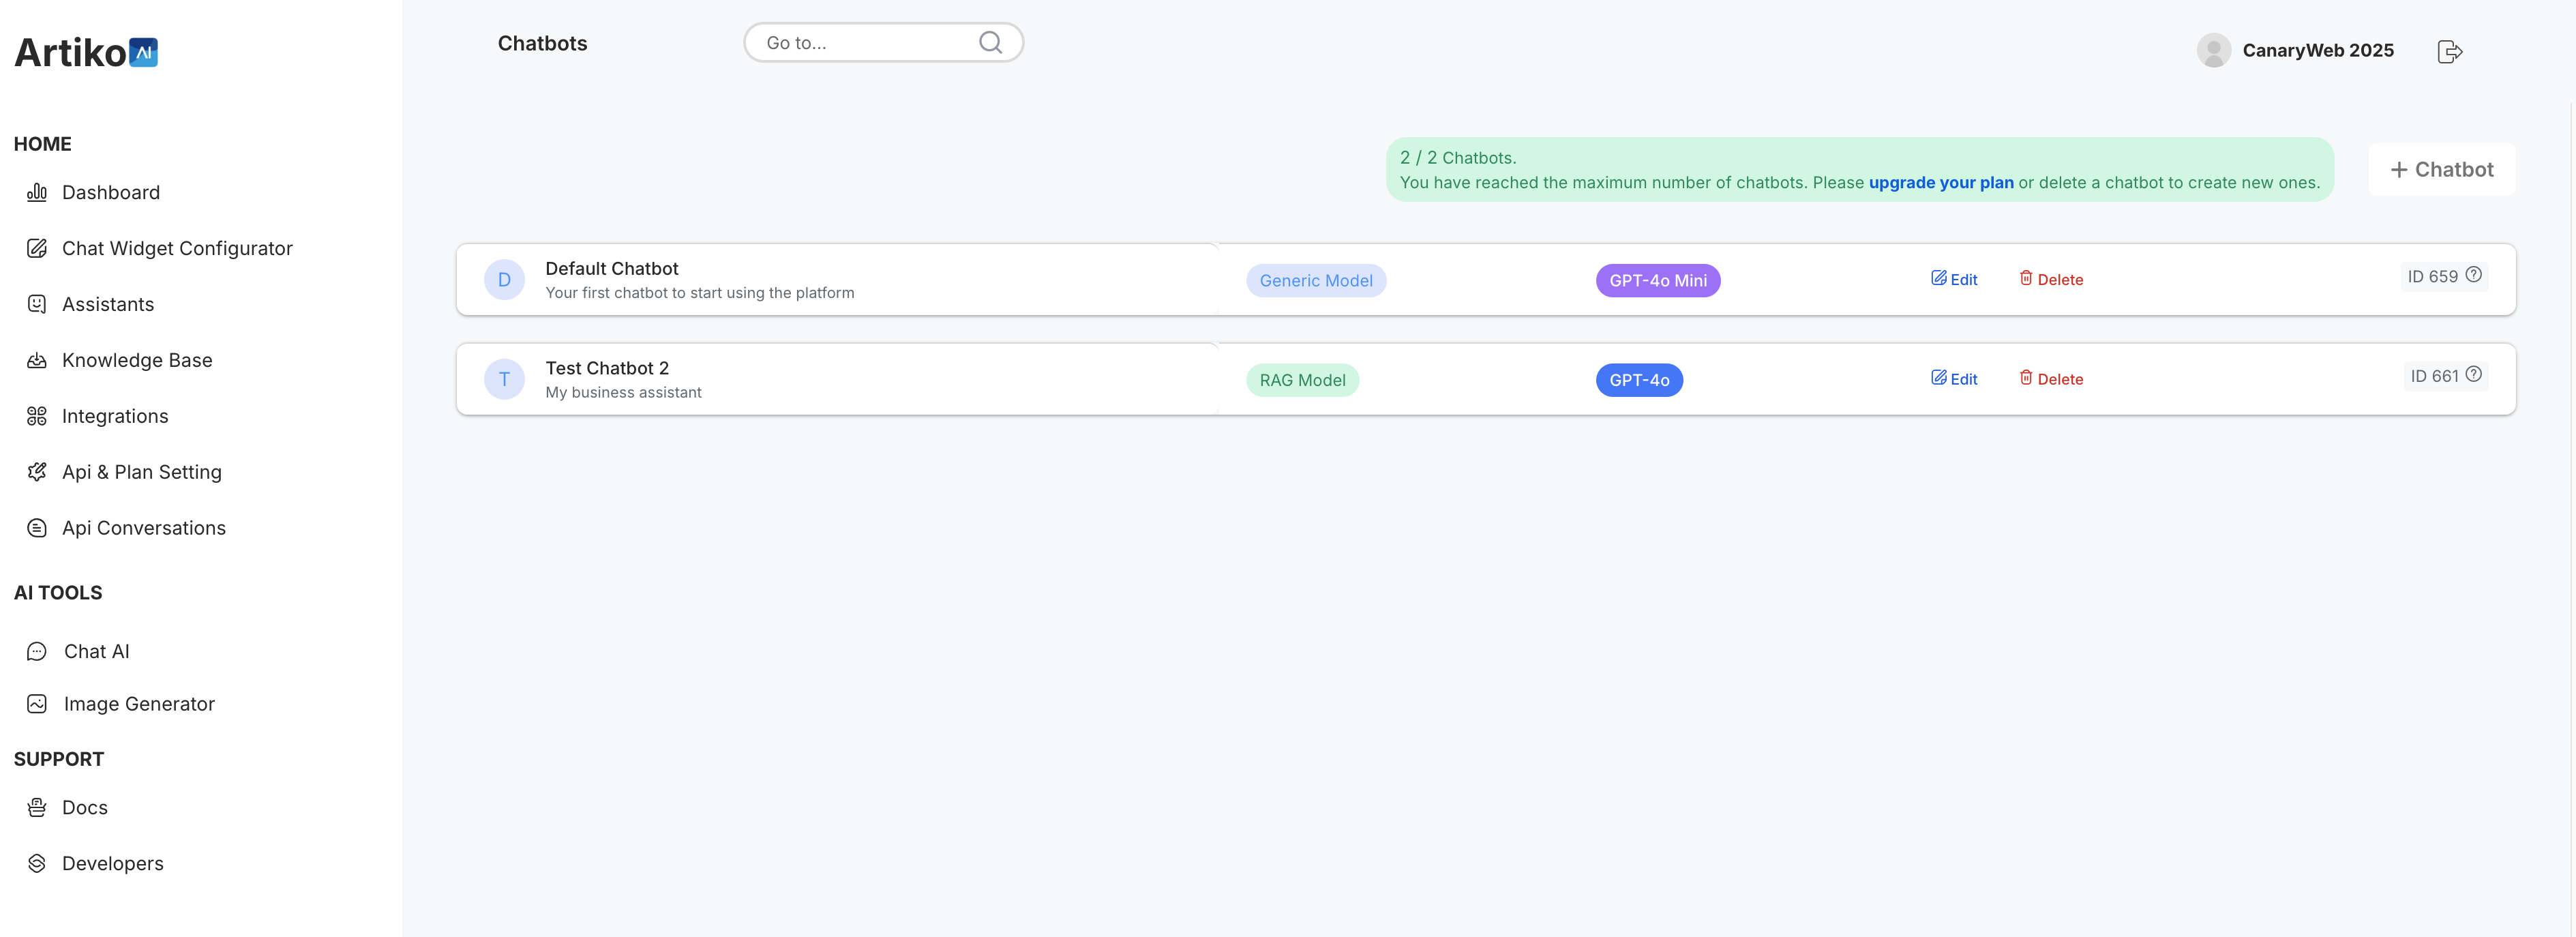
When you visit the Assistants section in the left-hand sidebar, you’ll see a list of your existing chatbots. Each entry provides:
- Assistant Name: A label you’ve given the AI assistant (e.g., “Default Chatbot” or “Customer Support Assistant”).
- Description or Role: A short phrase summarizing the assistant’s purpose.
- Source: The Knowledge Base Source from where the assistant retrives his custom knowledge. This should be from an Integration (e.g. Woocommerce, Prestashop Integration), RAG Model (Uploaded Knowledge Base Content) or Generic Model (With no custom Knowledge).
- Model: The AI engine powering the assistant (e.g., GPT-4, GPT-4 Mini).
- Actions: Options to Edit or Delete the assistant, plus the assistant ID (useful for integrations).
A usage counter (e.g., “1 / 5 Chatbots”) may appear, indicating how many assistants you’ve created out of your plan’s limit. To add a new assistant, click the + Chatbot button.
2. Creating a New Chatbot
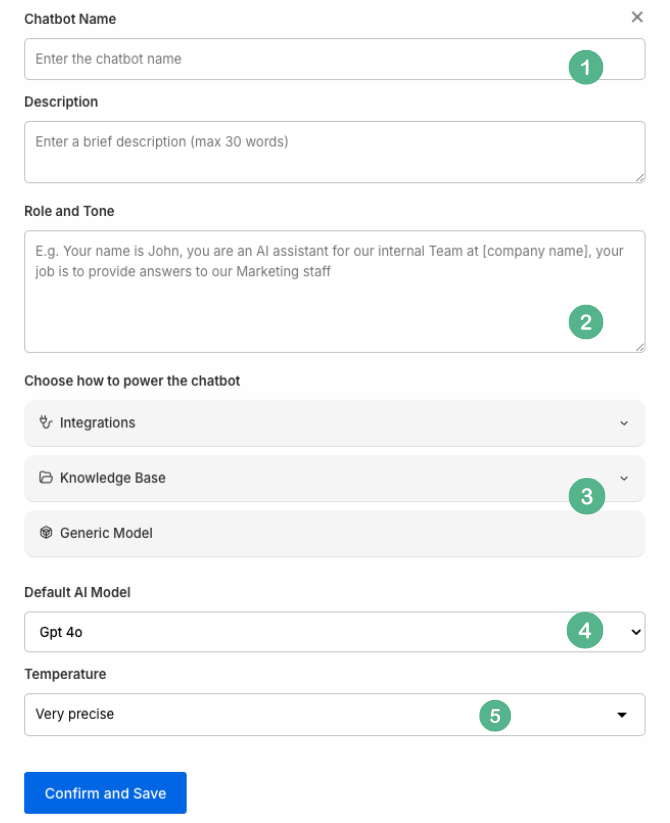
To create a new chatbot, click the + Chatbot button near the top-right corner. A dialog window will appear, prompting you to fill in several fields:
-
Chatbot Name & Description
Give your chatbot a clear name (e.g., “Generico,” “Support Bot,” “Sales Assistant”) and a brief description of its intended function.
Role and Tone -
Customer Care Example:
“You are a friendly and empathetic customer support assistant. Always greet users warmly and politely. If you are unsure of an answer, politely request more information. Provide links to relevant support documents when necessary. Write in a professional yet approachable tone.” -
All-Purpose Example:
“You are my all-purpose and general assistant who helps me with everything I need. Respond in the language in which the question was asked. If in doubt, answer in English. Use concise, direct language for clarity.” -
Technical/Developer Support Example:
“You are an advanced developer assistant specialized in JavaScript. Provide code snippets and best practices for debugging and performance optimization. Assume the user has moderate coding experience. If a question isn’t related to JS, clarify your limitations politely.” -
Tips:
- Match the tone to your audience (formal vs. casual, technical vs. layman).
- Include fallback instructions (e.g., how to respond if uncertain).
- Specify any legal or compliance language if needed (e.g., disclaimers, disclaimers for financial or medical advice).
-
Choose How to Power the Chatbot
Artiko.ai provides three main ways to “power” your chatbot:- Integrations (Plugins): If you have enabled specific plugins (e.g., Woo Data, PS Data), enable them here to let your assistant retrieve or process external data (e.g., from a WooCommerce store).
- Knowledge Base: Link the assistant to one or more folders in your Knowledge Base. The chatbot can then reference any uploaded documents or crawled web pages for more accurate responses.
- Generic Model: Use a standard GPT-based model without additional retrieval or plugin data. This is the simplest option for general Q&A or conversation.
-
Default AI Model
Choose an LLM variant such as GPT 4.0 Mini, GPT-4, or another available model. Higher-tier models may have improved reasoning but can require specific plan features. The Default AI Model is the model that your assistant will use during external API calls or using our Chat Widgets, in the Chat AI section you will always able to choose the AI Model to interact with. -
Temperature
This controls how “creative” or “precise” responses should be. In Artiko.ai, typical settings might be Precise (lower creativity) or Creative (higher randomness). Choose based on your use case.
This field is crucial for shaping your AI assistant’s “personality,” linguistic style, and the level of formality or empathy in its responses. Below are some guidelines and examples to help you set it effectively:
The Role and Tone acts like the assistant’s “operating manual.” By carefully crafting these instructions, you ensure the chatbot’s personality and responses align with your brand or project needs. You can find here more tips and a detailled guide on how to set the best instructions.
When finished, click Confirm and Save. You’ll be taken back to the Assistants list, where your newly created chatbot should appear.
3. Editing an Existing Chatbot
Each assistant in the Assistants list has an Edit button. Clicking it brings up the same configuration dialog, allowing you to modify:
- Name & Description: Adjust how you label or describe the assistant.
- Role and Tone: Update the default system prompt or instructions that shape the assistant’s personality or language usage.
- Power Options: Enable or disable specific plugins, change the linked Knowledge Base folder(s), or switch from “Generic Model” to “Plugin Model” (and vice versa).
- Default AI Model & Temperature: Swap out GPT-4 for GPT-4 Mini or tweak creativity as needed.
Remember to click Save after making changes. If you navigate away without saving, your edits will be lost.
4. Deleting a Chatbot
If you need to remove an assistant, click the Delete button alongside its entry. You will usually be asked to confirm, ensuring that you don’t accidentally remove a chatbot.
Note: Deleting a chatbot permanently removes its settings and configurations. If you want to preserve the chatbot for later, consider exporting or saving its prompts before deletion. Any linked knowledge base documents remain in the Knowledge Base section unless you explicitly remove them there as well.
5. Troubleshooting & Best Practices
- Plan Limits: If you can’t create more chatbots, you may have reached your usage cap (e.g., 10/20). Consider upgrading your plan or deleting unused assistants.
- Plugin Errors: Ensure your integrations are properly set up (e.g., WooCommerce or PrestaShop credentials) if your plugin-powered assistant cannot fetch data.
- Knowledge Base Not Linked: Confirm you have selected at least one folder if you want the assistant to reference specific files. Otherwise, it will use only the generic model data.
- Prompt Refinement: For more precise control, edit the “Role and Tone” field to guide the chatbot’s personality, language, or domain specificity.
Keep your knowledge base documents well-organized and up-to-date. If you have an assistant relying on older files, consider re-uploading or re-crawling to ensure your chatbot provides the most current information.
Conclusion
The Assistants section in Artiko.ai is your central hub for managing multiple AI chatbots, each configured with a variety of models, plugins, and knowledge bases. By creating, editing, and refining these assistants, you can address a broad range of use cases—from general Q&A and sales inquiries to specialized technical support.
Remember to explore the Role and Tone settings, and experiment with different plugins and knowledge base folders to get the most out of your chatbots. If you need further assistance, reach out to the Artiko.ai support team .