
Artiko.ai – Chat Widget Configurator: Step-by-Step Guide
Welcome to the Artiko.ai Chat Widget Configurator! Below, you’ll find a detailed overview of each step you see in the image. By following these instructions, you can quickly set up, customize, and manage your own live chat widget and its automated assistant.
1. Select Your Assistant
The first step is choosing which AI or bot configuration will power your chat. If you have multiple assistants available in your Artiko.ai account, pick one from the dropdown labeled “Default Chatbot” (or whichever name you’ve assigned). This determines how your widget replies to users, including its AI “personality” and knowledge base.
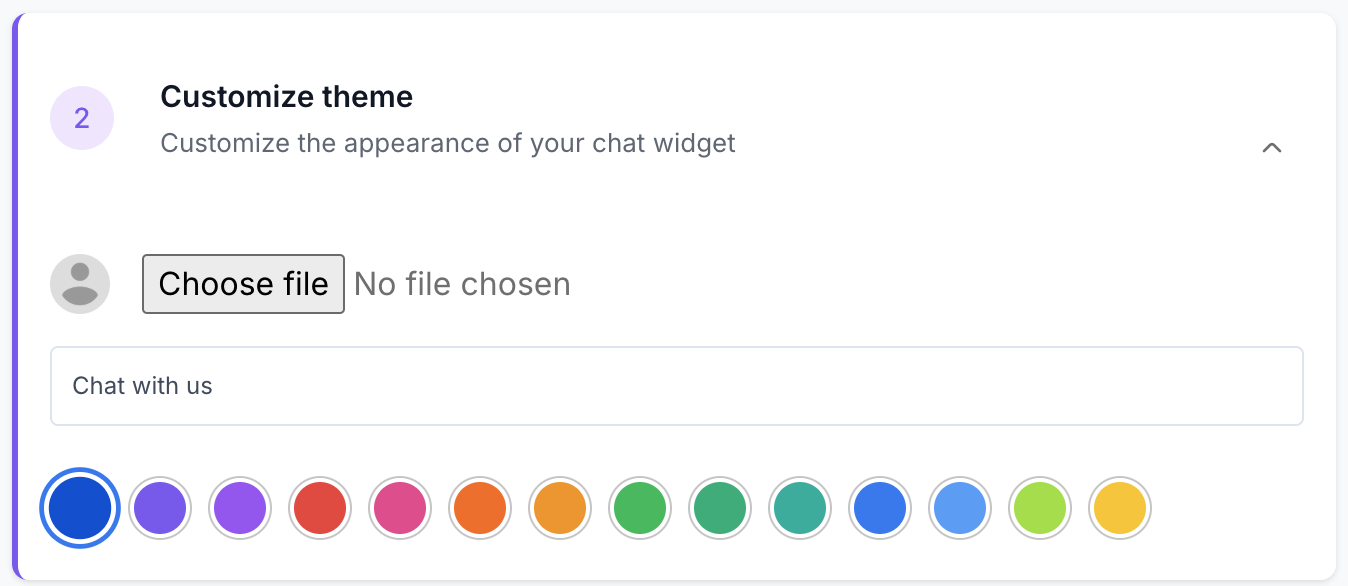
2. Customize Theme
In this section, you can personalize the look and feel of your chat widget to match your brand or website design. Here are the main options you’ll see:
- Upload an Avatar or Logo: Use the “Choose file” button to upload a custom image that will appear in your chat widget, often used for a company logo or a bot avatar.
- Widget Header Text: A text field (defaulted to “Chat with us”) where you can set the header or title that appears at the top of the chat window.
- Color Selection: Choose from a range of preset colors for the widget’s header, buttons, or accent elements. Just click on a color circle to instantly preview it in your widget.
By making these adjustments, you can ensure the chat widget stays consistent with your brand identity and creates a welcoming experience for users.
3. Text & Messages Customization
Configure all the text shown within your widget:
- Welcome Message: The first line a visitor sees when they open the chat. Something like “Hello, how can I help you?”
- User Messages: Style or label for your user’s chat bubbles (e.g., “User message sample”).
- Placeholder Text: The text that appears in the message input field (e.g., “Type your message…”)
- Send Button Label: Typically “Send,” but you can rename it.
- AI Disclaimer: A note like “AI-based chat, may provide inaccurate information.”
4. Configure “Talk to Human” Button
If you want to allow users to connect with a human operator at any time, enable the “Talk to Human” (or similarly labeled) option. You can decide:
- Button label: “Talk to Human,” “Connect with Support,” or any custom text.
- Handoff method: Where the conversation goes—often integrated with a third-party platform like Rocket.Chat.
- Agent notification: How your team is alerted when someone clicks the button (email, internal dashboard, etc.).
5. Set Custom Questions
This step lets you define up to three quick questions or prompts the user can click on to start the conversation. Examples:
- “What are your opening hours?”
- “Do you offer a trial?”
- “How can I speak with a human agent?”
These appear as buttons inside the chat for quick user access, making it easier for visitors to get relevant info fast.
Live Preview Panel
On the right side of your screen (as shown in the image), you’ll see a live preview of your chat widget. It updates as you change the theme, messages, or other settings. This lets you see exactly how your users will experience the chat before you embed it on your site.
“Chat Widget” & “Embed Chat” Tabs
At the top of the configurator, you’ll notice two tabs:
- Chat Widget: This is where you configure everything about the widget itself, from design to text to human handoff.
- Embed Chat: Once you’re satisfied with your configuration, switch to this tab
to grab the code you’ll place on your website. Copy the snippet and paste it near the
</body>tag (or wherever recommended) on your site.
Managing Previously Created Widgets
If you have multiple chat widgets or you want to revisit a saved configuration, the “Widgets” section (or a similar list in your Artiko.ai dashboard) displays all previously created widgets. Here, you can:
- View: See the details of each widget, including its name and creation date.
- Edit: Reopen a widget’s settings to change its theme, messages, or other parameters.
- Copy Code: Quickly grab the snippet again if you need to paste it elsewhere.
- Delete: Remove the widget from your account if it’s no longer needed.
This area helps keep your chat widgets organized and makes it easy to update or reuse settings across different web pages or projects.
That’s it!
By following these steps in the Artiko.ai Chat Widget Configurator, you’ll be able to tailor your widget’s
appearance, functionality, and messaging to deliver a great experience. Remember, the live preview
updates in real time, and you can always revisit the “Embed Chat” tab to copy your latest snippet.
Enjoy connecting with your audience in a faster, more engaging way!